
1
By default, you can sign in to your admin dashboard from any internet connection. If you want an extra layer of protection, you can add a list of trusted IP addresses. After that, [only connections on that list can open your admin dashboard].
An IP address is the number that identifies the internet connection you’re using right now, like 123.45.67.89. Your home Wi-Fi, your office Wi-Fi and your phone’s mobile data each have a different one.
An IP address is the number that identifies the internet connection you’re using right now, like 123.45.67.89. Your home Wi-Fi, your office Wi-Fi and your phone’s mobile data each have a different one.
2
Who should use this?
This feature is optional, and most site owners don’t need it. It’s a good fit if:
– You always manage your academy from one fixed place, such as an office with a business internet line.
– Several people share your admin account and you want to limit where it can be used.
– Your provider has given you a static (unchanging) IP address.
Skip it if you manage your site from home Wi-Fi, from your phone, or while traveling. Those connections change IP often, and you’d have to update the list every time. A strong, unique admin password protects you well in those cases.
This feature is optional, and most site owners don’t need it. It’s a good fit if:
– You always manage your academy from one fixed place, such as an office with a business internet line.
– Several people share your admin account and you want to limit where it can be used.
– Your provider has given you a static (unchanging) IP address.
Skip it if you manage your site from home Wi-Fi, from your phone, or while traveling. Those connections change IP often, and you’d have to update the list every time. A strong, unique admin password protects you well in those cases.
3
Follow these steps to add a trusted IP:
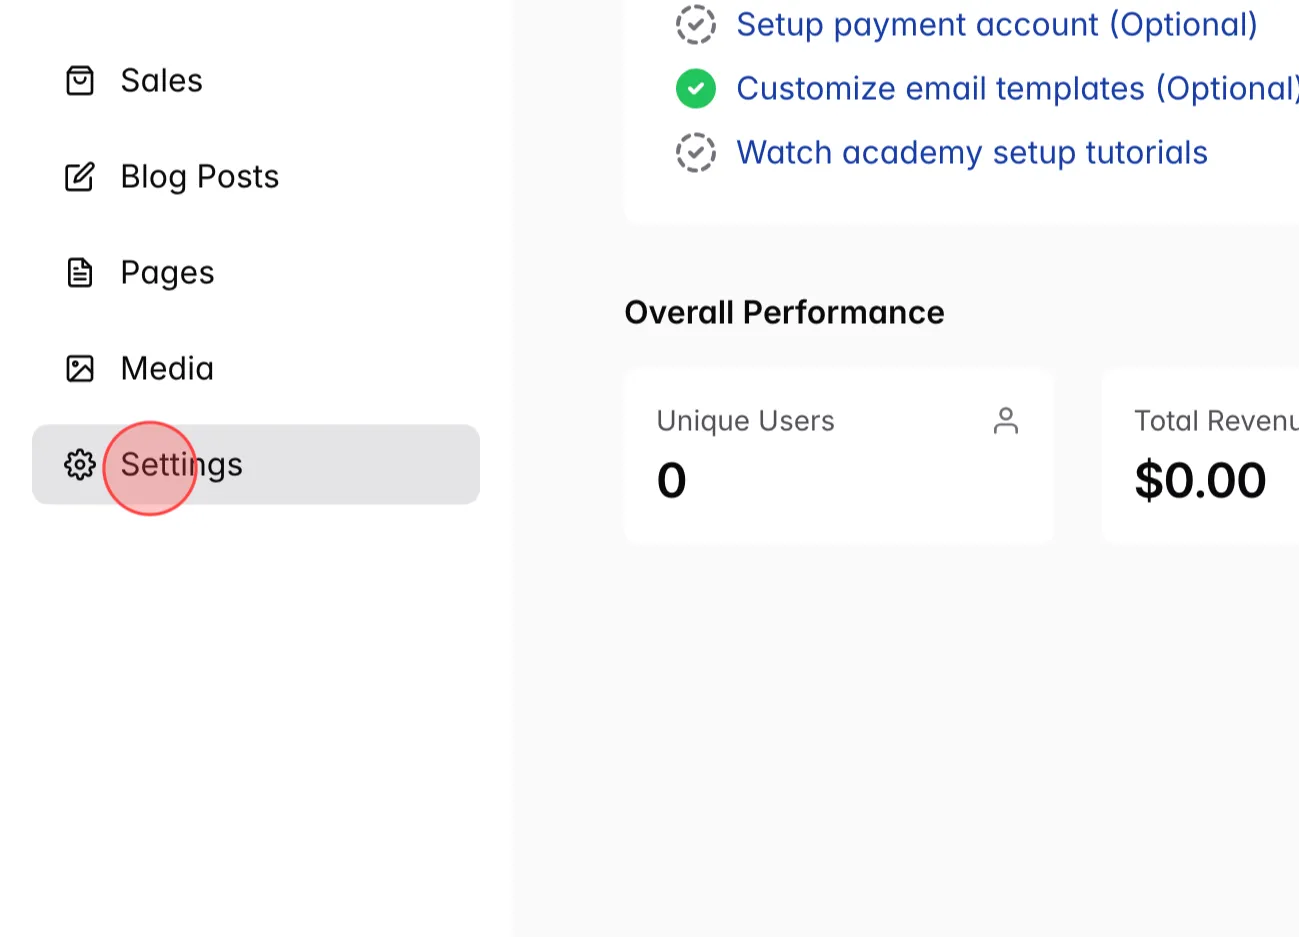
From the Admin Dashboard, click Settings
From the Admin Dashboard, click Settings
4
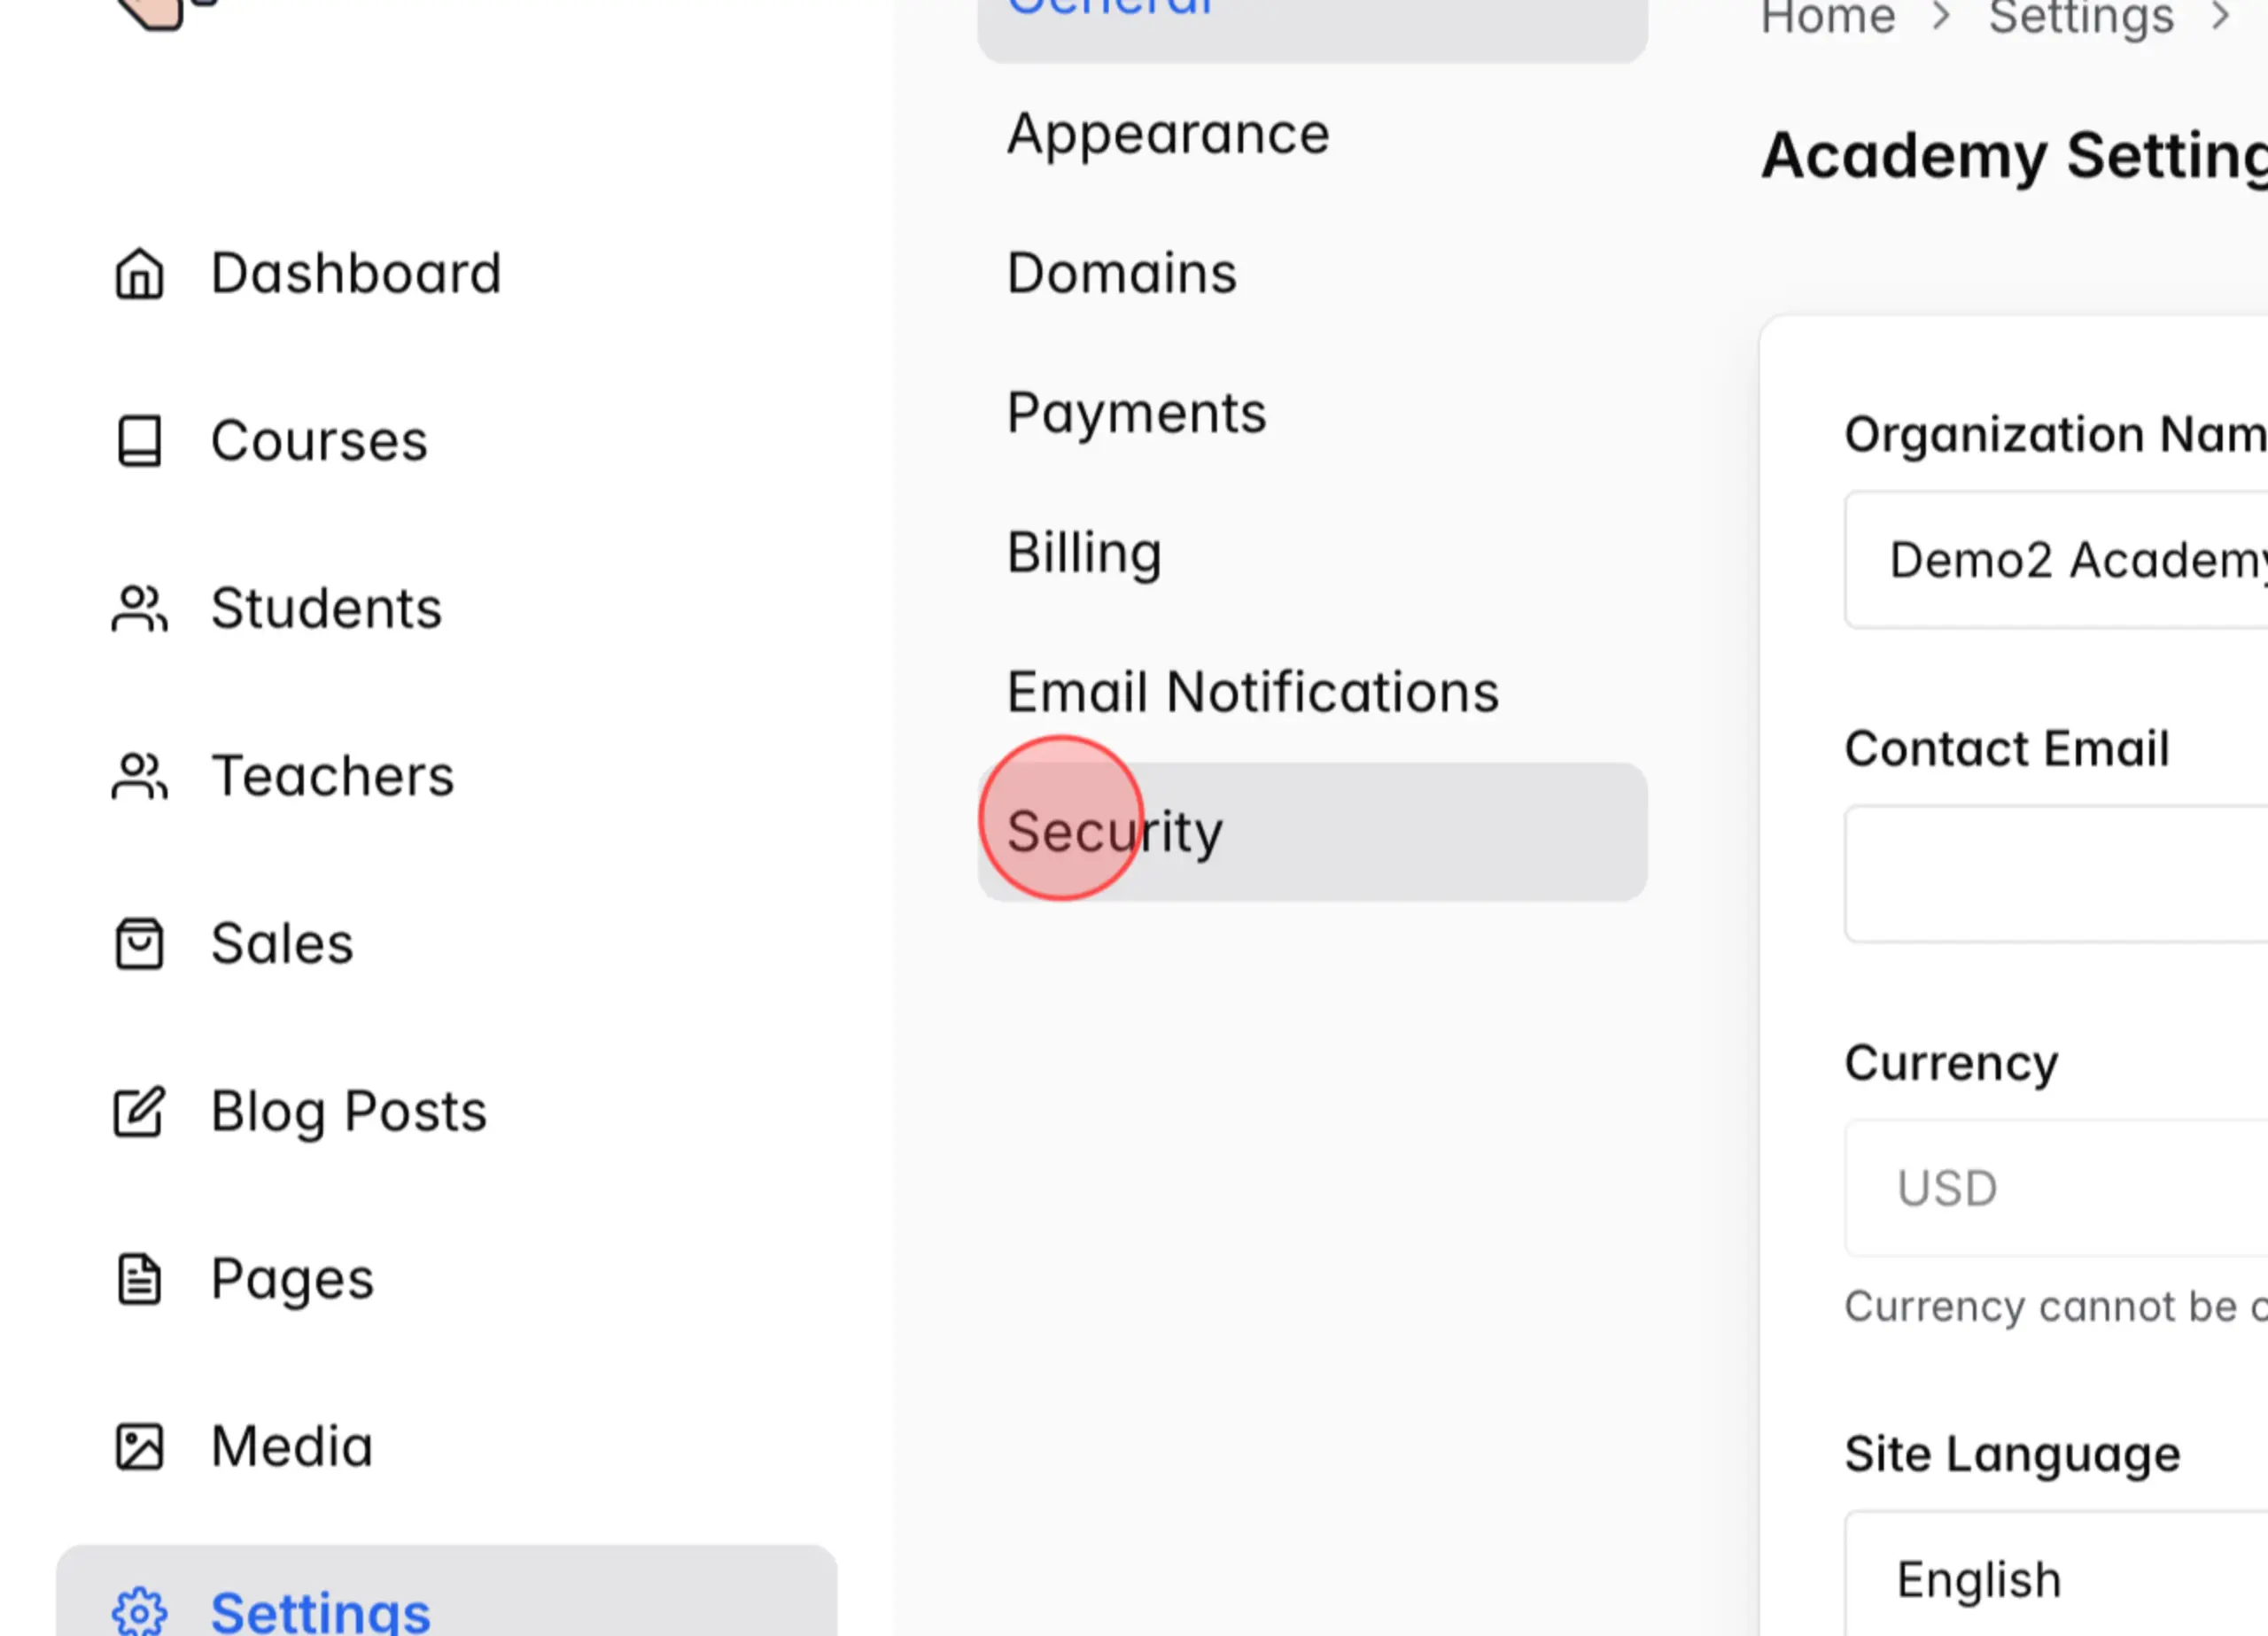
On the setting menu, click Security
5
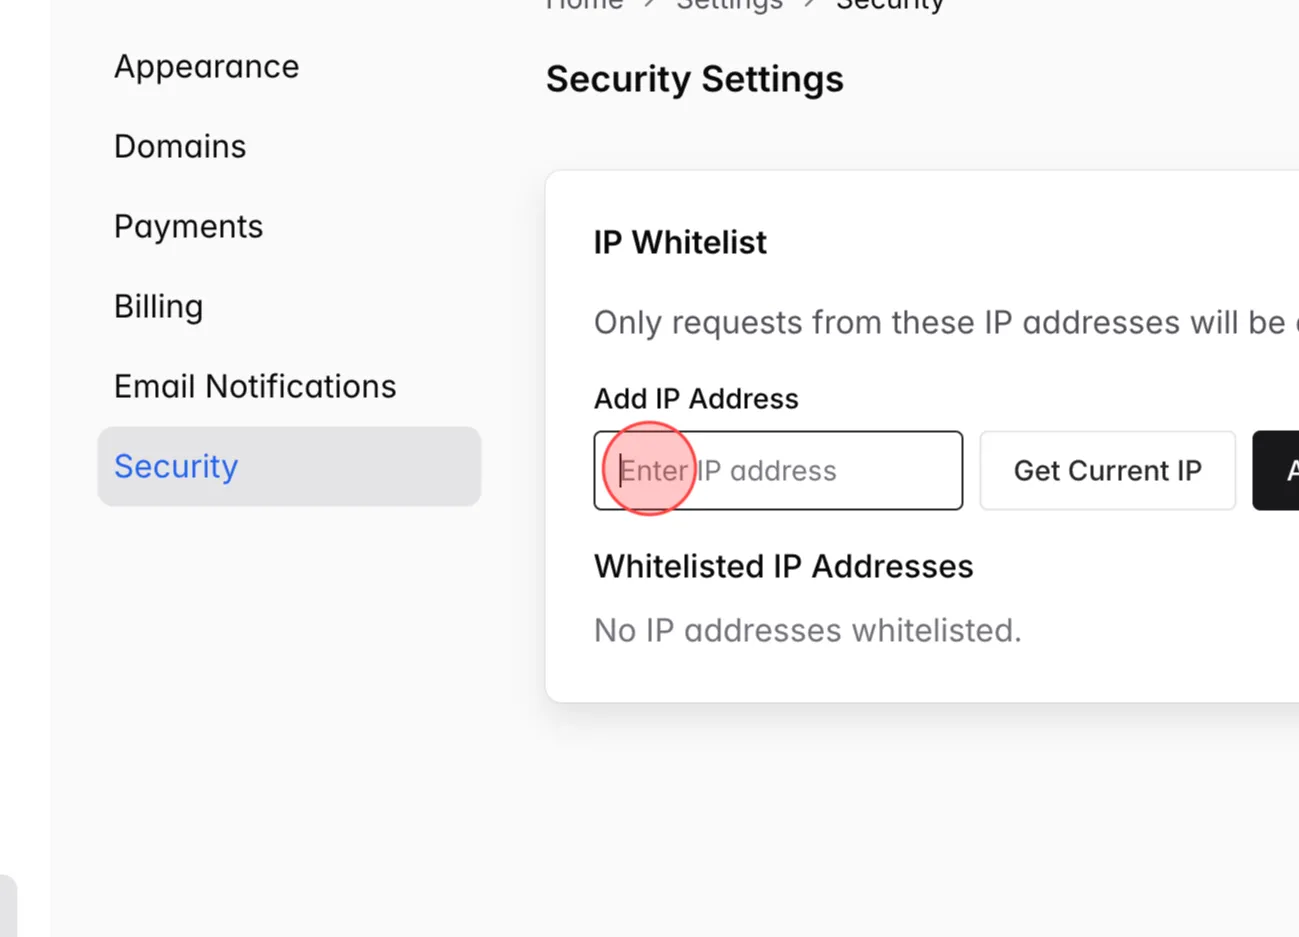
Click on input Add IP address and enter a valid IP address in field.
6
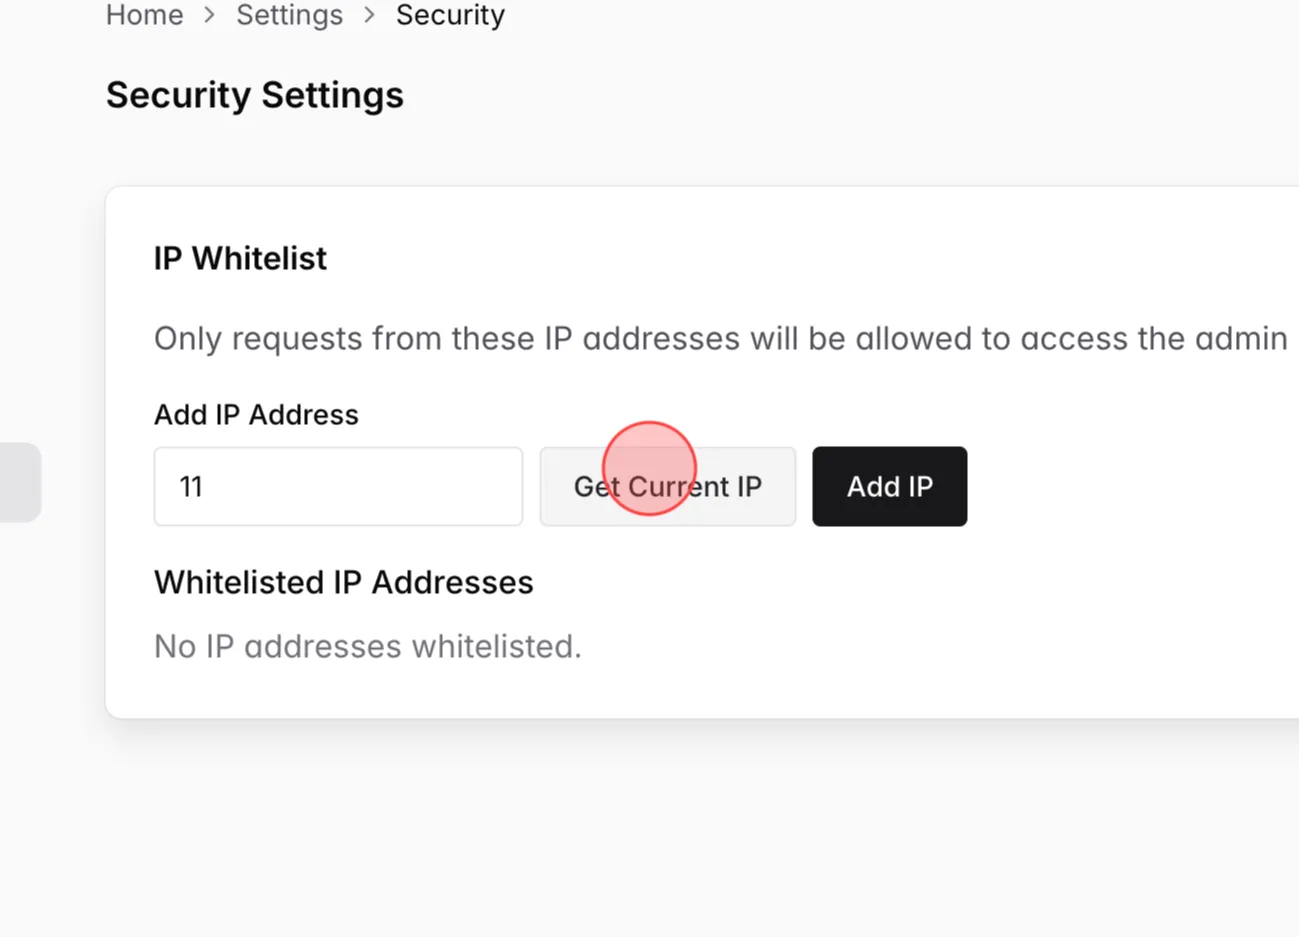
Or you can click Get Current IP. This fills in the IP of the connection you’re using right now. You can also type an address manually to allow another location, such as your office.
7
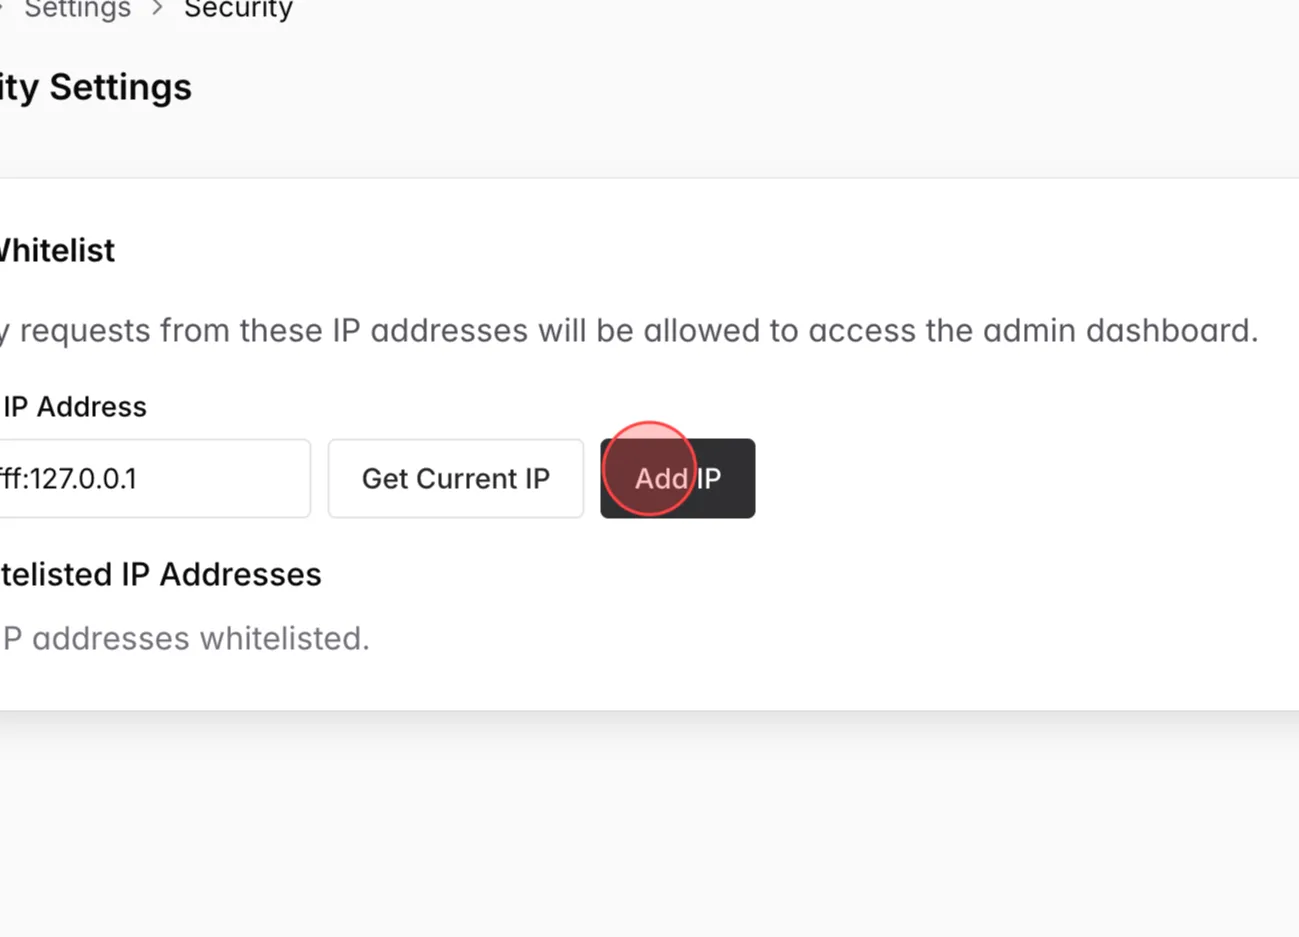
Click Add IP to complete
8
Removing an IP
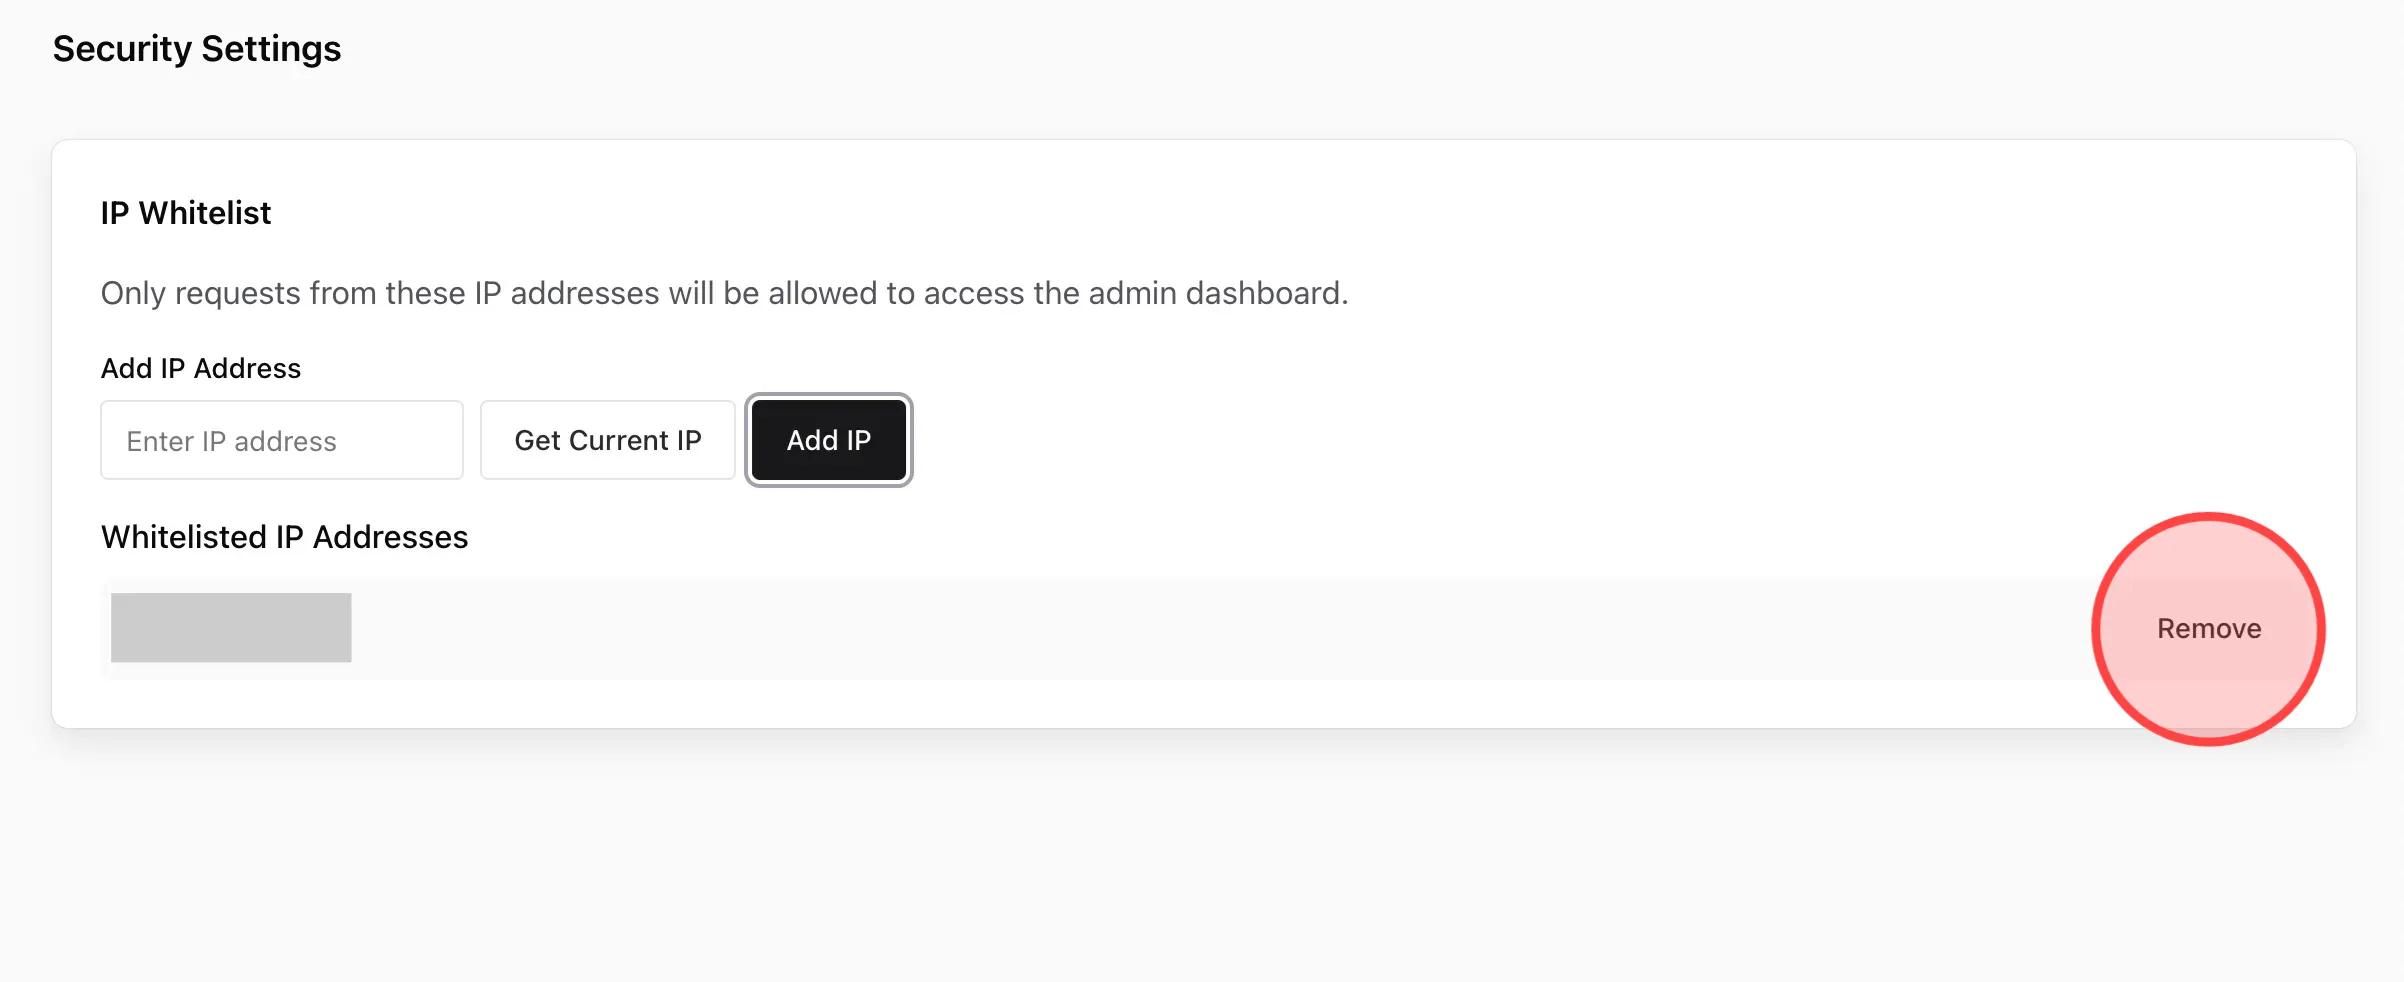
Go back to Settings → Security, find the address in the trusted list, and click remove at the end of its row. The change takes effect immediately. [If you remove every address, admin access returns to normal — anyone with your password can sign in.]
Go back to Settings → Security, find the address in the trusted list, and click remove at the end of its row. The change takes effect immediately. [If you remove every address, admin access returns to normal — anyone with your password can sign in.]
 English
  日本語
日本語